
Menu:
Face Mask
This page will explain how to make a no sew face mask from a single piece of laser cut fabric. I used a Glowforge to make these parts, but any laser cutter should work.
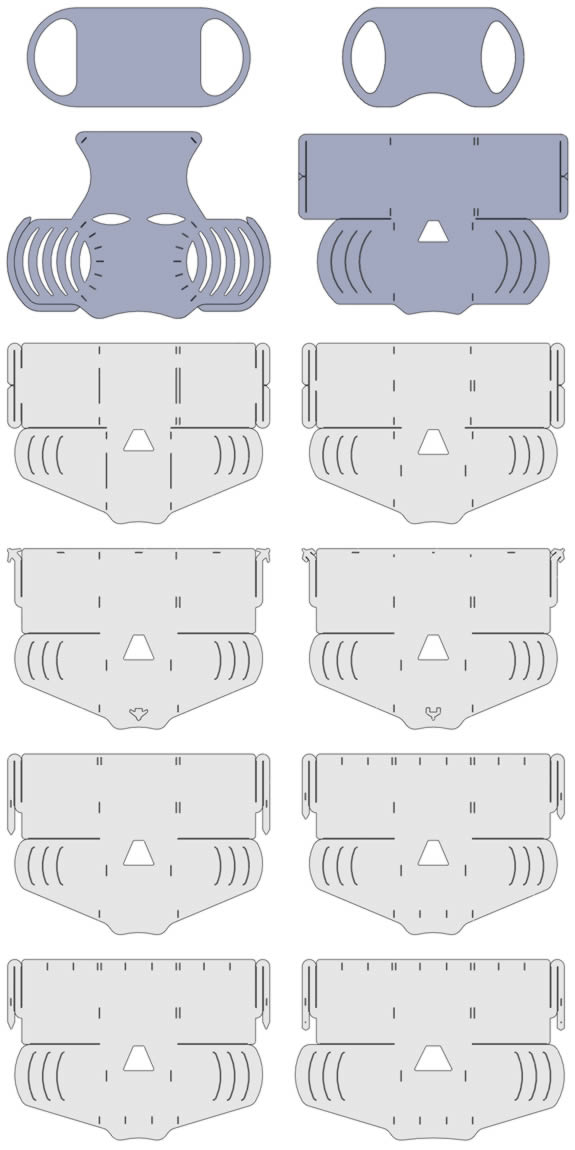
The four files below include three different sizes for the mask, and assembly instructions. Each size is adjustable, and there is some overlap between the sizes. The large is probably appropriate for most adults.
(Face Mask-Assembly Instructions .pdf)
Warnings/Notes:
- Make sure to watch the laser while cutting. It is possible the fabric may catch on fire.
- Rinse mask with water before first use. There will be char/dust around the edges after cutting that could blow into your eyes.
- This is not meant to be used in place of a respirator or FDA approved mask.
- Washing a cotton mask by hand may help prevent fraying. Also a product such as Aleene’s Stop Fraying may be applied around the edges.
- Tightly woven fabric, such as quilting cotton will work (CDC info).
- Polyester fabric will prevent the fraying issue because the laser will melt the material edge as it cuts. I used polyester bed sheets to make sure the material would be safe to breathe through.
- The ear cutouts in the designs are not perfectly symmetric. This was done so you can use half sizes without having the mask shift too far to one side. For example, if using the second slot on the left and right is too loose, you could use slot two on one side, and slot one on the other. If some of the larger ear cutouts are not needed, they may be cut off with scissors.
- Air assist fan may move fabric while cutting. Options to prevent this include blocking the air assist fan, using an adhesive to prevent movement, or placing a heavier material on top and cutting through both. A file to make a part to block the air assist fan is at the bottom of this page.
- The masks will probably take between one and three minutes to cut, depending on power and speed settings. They take about three minutes to assemble.
The video below shows how to assemble the mask. The two paper clips are not required, but make assembly much easier.
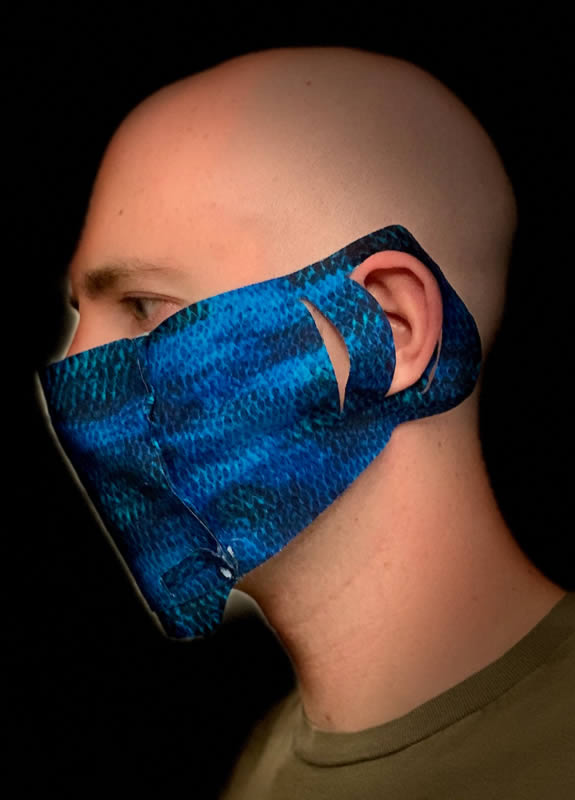
The image below shows me wearing a finished mask made out of a fish scale pattern fabric.
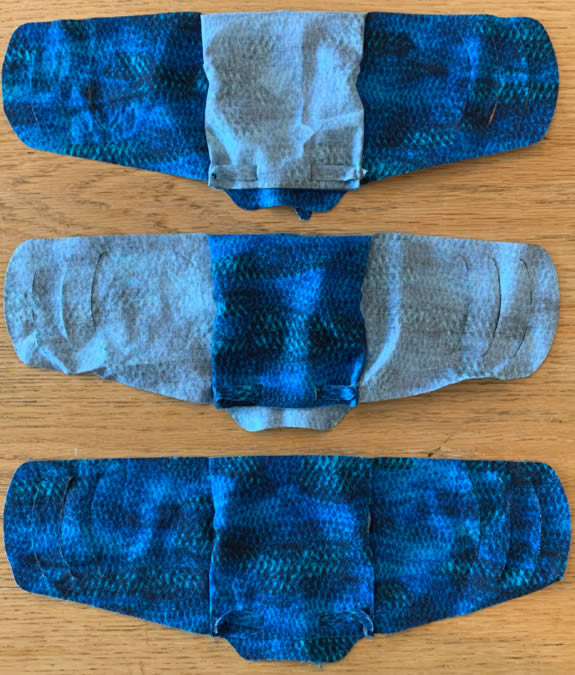
I decided to create three different size masks. The image below shows the relative size of the large and small next to each other. The medium size (not shown) is about 89% of the large size. The small size is about 78% of the large size.
The video below shows the adult size mask being cut on my Glowforge.
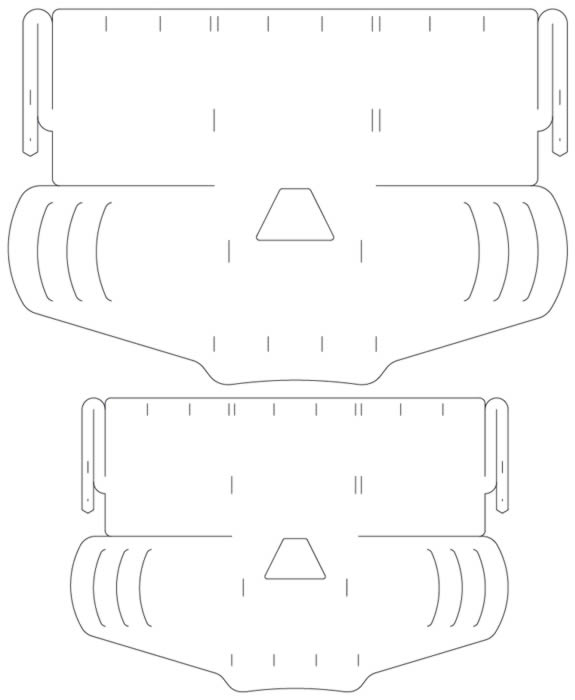
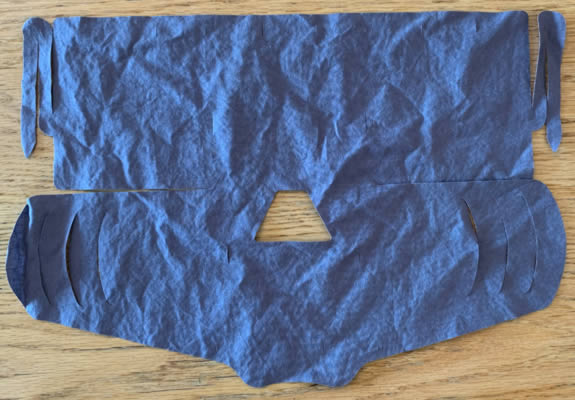
The image below shows the mask flat pattern after being cut.
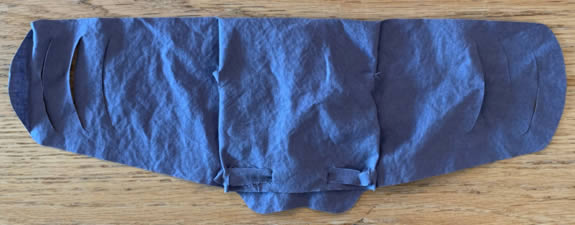
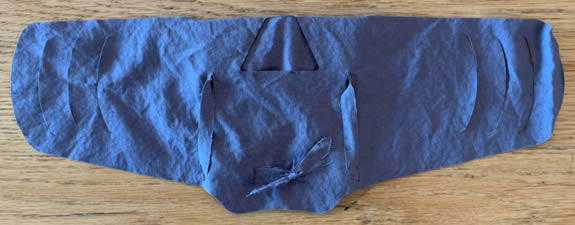
The image below shows the mask from the front after assembly.
The image below shows the mask from the back after assembly.
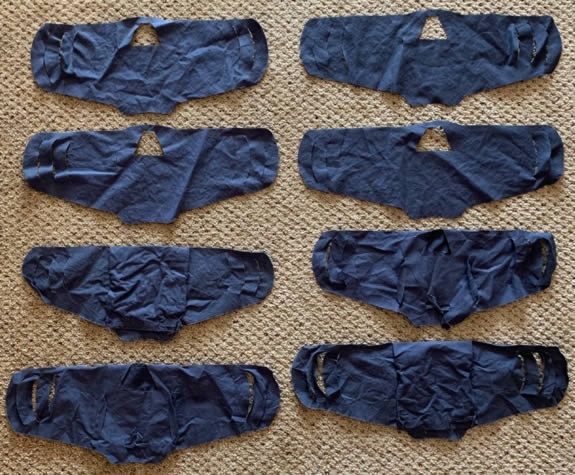
In total there were 12 different designs for the face mask. Many of the changes between designs were to get the size right for the ear cutouts, and to figure out how the mask would fold and be held together without any sewing. The image below shows all 12.
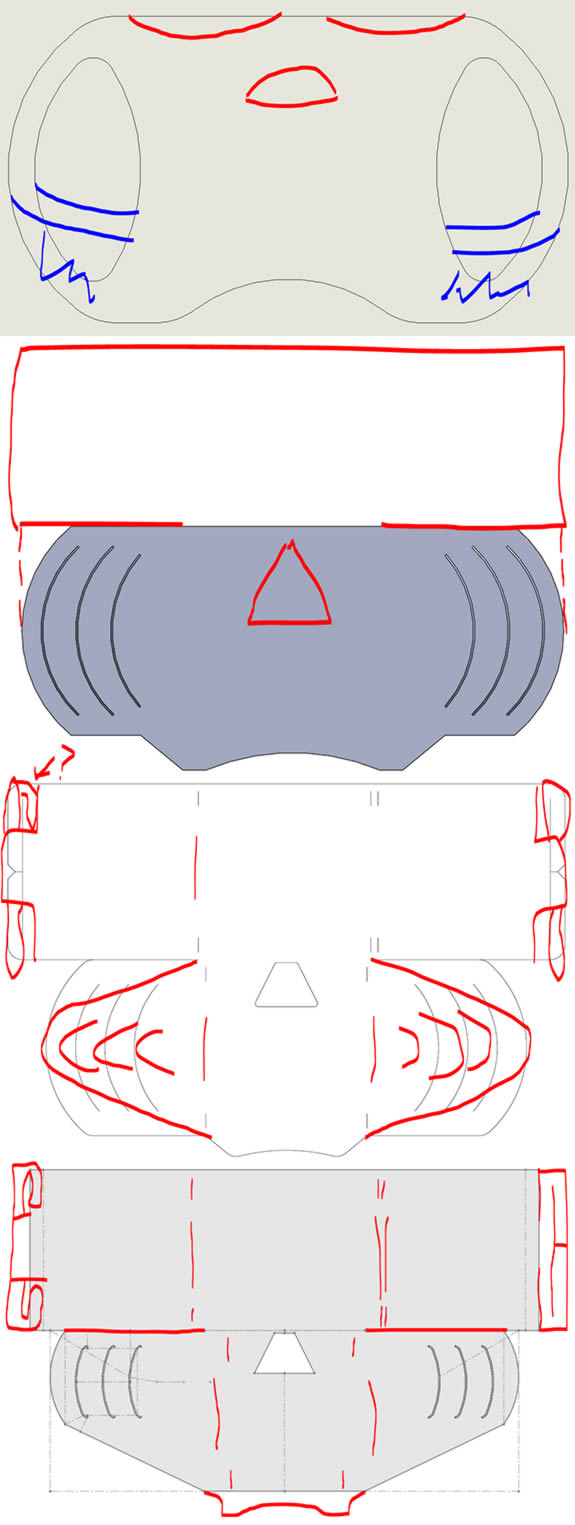
Before making many of the designs I would use the previous design to sketch the changes I wanted to make. Some of the examples of these sketches are shown below.
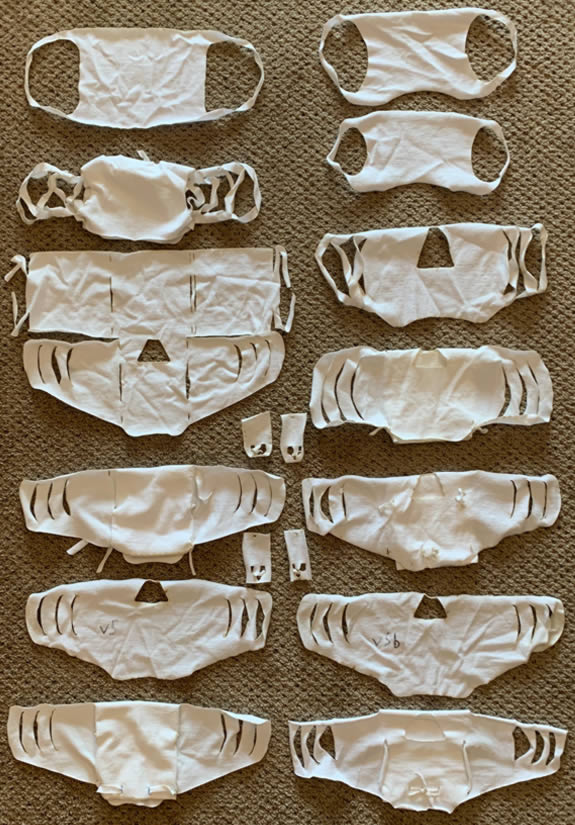
The first few designs were made out of old white t-shirts. Through all of this testing I realized the t-shirt material was way too stretchy, which made it hard to pick the correct size for the mask. The image below shows these first designs.
After realizing how stretchy the t-shirt material was, I decided to try making the masks out of a higher thread count fabric. I bought some bed sheets and made the next few designs out of that, shown below.
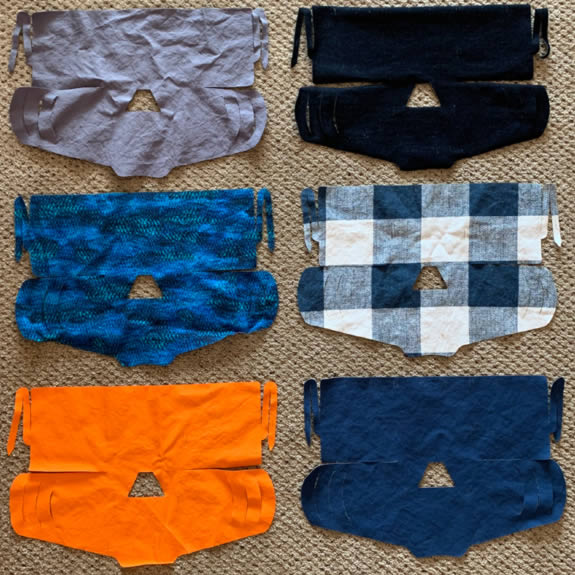
I eventually started buying quilting cotton, which was recommended by several articles I read about homemade masks. The image below shows some of the different cotton materials I made the masks out of.
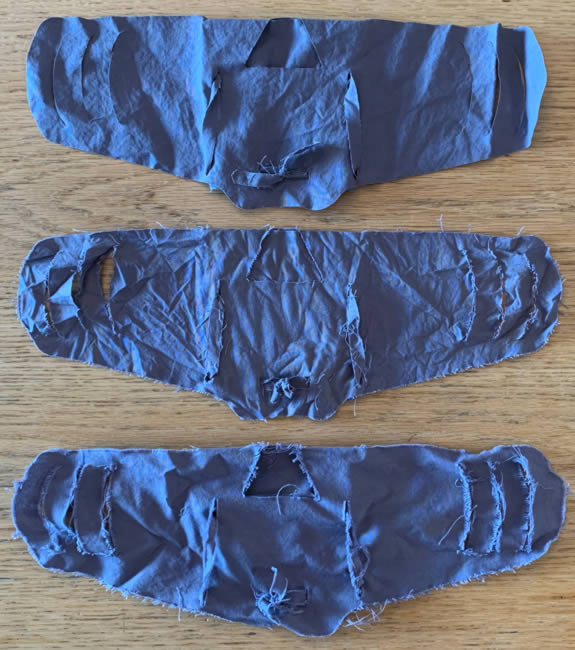
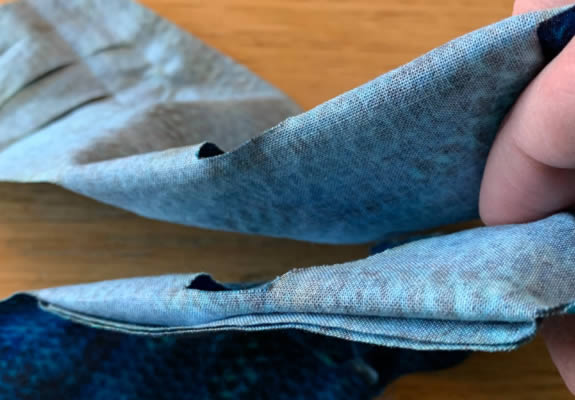
The image below highlights the fraying issue with using cotton for the mask. The top mask was not washed. The middle mask was washed by hand. And the bottom mask was run through a full washing machine and drying cycle. Fraying is not an issue if polyester is used.
When folding the mask there are a few options for material with a single sided pattern. The first two masks below show what it will look like folded with the pattern up or down, using the assembly instructions or video. It is possible to have the pattern shown on the outside for the entire mask, shown by the third mask, but the mask performance will not be as good. During the step when the top three folds are flipped down over the front of the mask, if you instead flip it over the backside of the mask, that will make a mask with the pattern shown on all outside parts of the mask.
The image below shows how the performance of the mask will be reduced when the pattern is on all exterior sides of the mask. The top mask shows the design as intended. The bottom mask shows what happens when the pattern is shown on all parts of the outside of the mask. Because the top three sections of the mask were flipped over the backside instead of the front, two of the layers are exposed rather than covered inside the mask, this will create additional pathways for air to enter and exit without passing through the material. This will also cause glasses to fog up easier.
One issue I had when I first started making the masks was the material would move while it was being cut. I realized this was because of the air coming from the air assist fan on the back side of the laser head. I decided to make a small removable cover for the fan that I could put on while cutting fabric. The image below shows the design.
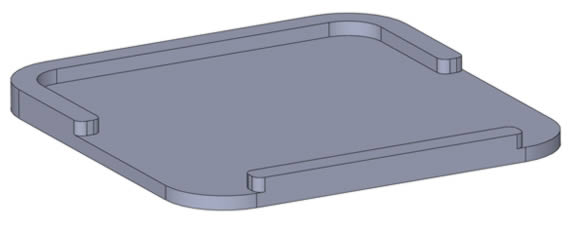
I cut the parts out of 1/16" acrylic, and bonded them together with Weld-On 4 Acrylic Adhesive. If you decide to add this part to your laser cutter, remember to be extra cautious of flare-ups, remove the part when it isn't needed, and you will probably need to clean the optics more frequently. The image below shows the cover on the air assist fan.

The file below can be used to cut the air assist cover parts. If you use material thicker than 1/16" it might not fit.
Page created: 2020