
Menu:
Baby Shark
When I was on a flight to Hawaii with my sister and nephew, pretty much the only thing that would keep him happy was watching the Baby Shark song.
Since I had recently received my Glowforge laser cutter, I decided to make him some acrylic Baby Shark characters. I started with screen captures which I opened in Illustrator, and then used the Image Trace feature to outline all of the different colors, and saved that as a vector file.
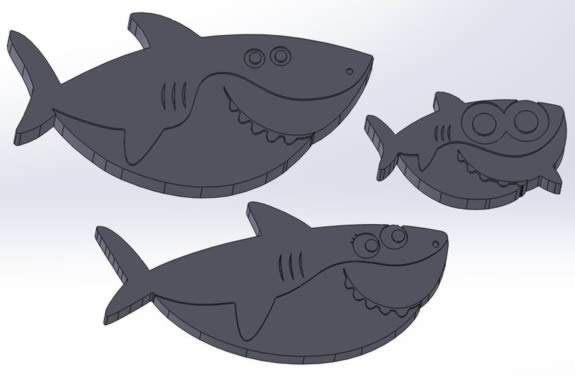
I imported the vector file into a SolidWorks sketch, deleted the lines I didn't need, connected any gaps, and then extruded the sketch into a solid part. I decided to do this for the baby, mom, and dad sharks. The three parts are shown below.
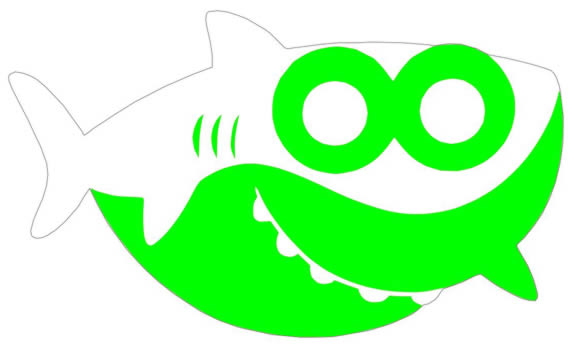
After the parts were created, I saved each one as a .DXF file and opened it in Inkscape. In Inkscape I was able to fill in the areas I wanted to engrave as a different color so the laser cutter would know it needed to perform different operations on the same file. I then saved it as a .PDF. A screenshot from the final file is shown below.
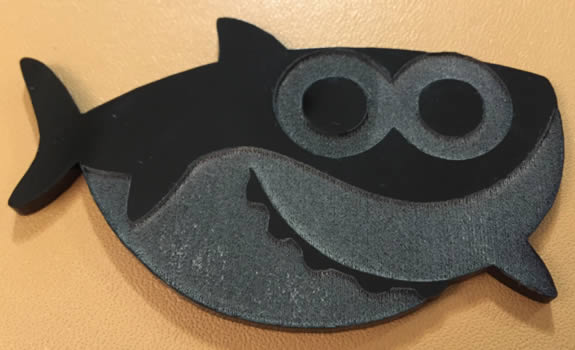
Up next it was time to laser cut the first part! I knew the cut settings from a previous test, but took a guess at the engrave settings. As you can see in the image below, I had the power on the engrave set way too high. I also noticed the gills didn't show up.
After a few more tests I was able to dial in the power setting for the engrave, and also adjust some settings in Inkscape to get the gills to show up. The video below shows the end of an engrave followed by the cut for one of the parts. The video is at 2x speed.
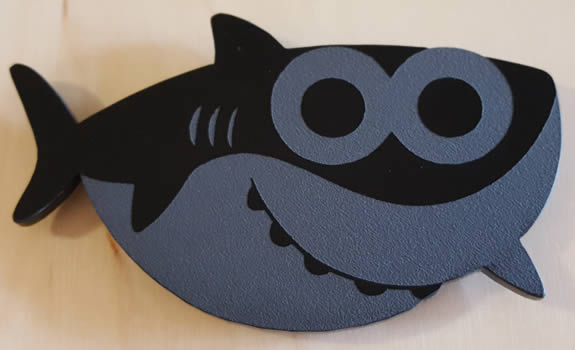
The image below shows one of the completed parts with the correct power settings.
After I made a few parts, I decided it would be really cool to turn them into fridge magnets, so my nephew could play with them on the fridge. I made a new file with a hole for the magnet, and cut that part out, as well as the original part without the engraving. The parts for the mom and dad sharks are shown below.
I originally made them in black because that was the only color of acrylic I had at the time. But I ended up ordering a bunch of other colors, and decided that blue was a little closer to the color of the sharks in the video, so I also made them in blue.
I bonded the acrylic pieces using Weld-On 4, which is a solvent bonder. I added a drop of super glue to the magnet so it wouldn't rattle, and also so it would stay connected to the plastic if the shark broke open.
After I finished making the sharks, I decided to make an undersea background from construction paper, also using the laser cutter. I made these parts the same way I made the sharks. After I was finished making the undersea background, I put on a light blue shirt, attached the background, and filmed myself singing part of the Baby Shark song for my nephew, which is of course shown in the video below.
After I finished making the video, I had the background laminated so my nephew could attach the sharks to the fridge over the background, shown below.
After making the original sets, I decided to make the baby in all of the other acrylic colors I had. The image below shows a green, yellow, white, and red version.
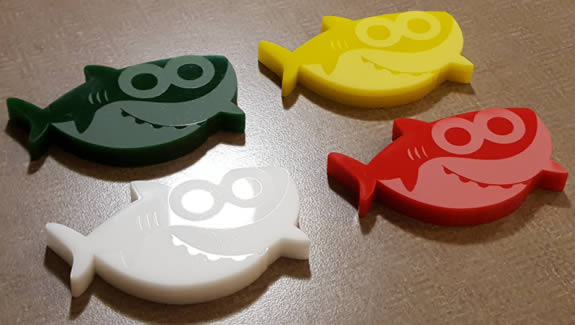
The engrave shows up a lot better on the darker colors. The details are pretty hard to see on the white one.
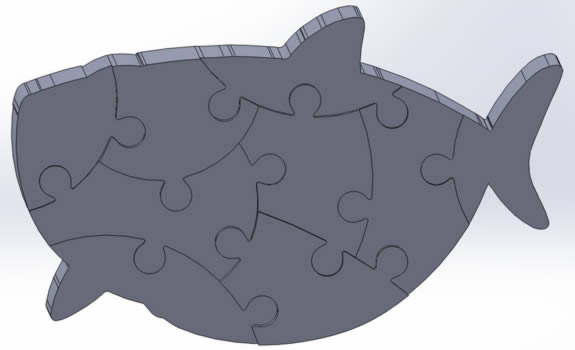
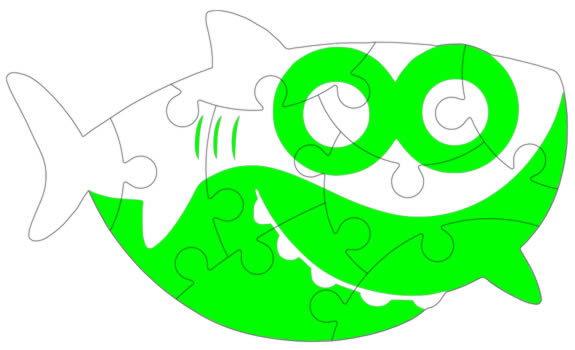
After making the magnets, I came up with another use for the Baby Shark design; I decided to make a wood puzzle. I started by enlarging the shark to take up most of the space in a 12" x 8" piece of wood. Then I split the design into nine pieces and added connecting features to hold the puzzle parts together. This is shown below.
The file that was created for the laser cutter with the cut and engrave features is shown below.
The image below shows the first set of puzzle pieces part way through the cut, after the engrave was completed.
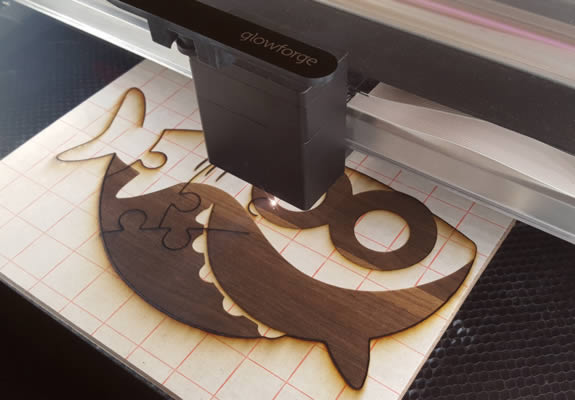
One mistake I made with the design was engraving the wrong areas. With the magnets that were made from acrylic, the features the laser engraved would become lighter than the surrounding plastic. But with wood, the engraved features get darker. After making the first set of parts, I decided to invert the areas that were engraved, and make another set of parts.
Along with the puzzle pieces, I made a base for the puzzle, with a recessed area for the pieces to fit in. I decided to give the puzzle to my nephew for his second birthday. The design for the base part is shown below.

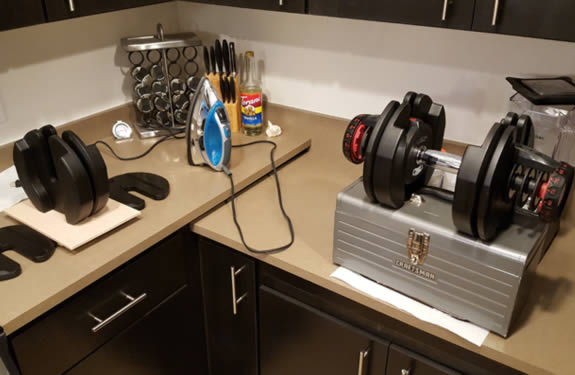
After cutting the two pieces for the base, I needed to glue them together. At first I tried using clamps but the thin top piece that created the recess for the puzzle would warp up in areas that weren't close to a clamp. So I ended up using a tool box to press down on the entire part, and added a weight on top to make sure everything was flat. I was also using the weights to try to flatten a few pieces of wood that were warped. This is shown below.
After cutting the second set of puzzle pieces, I sanded and coated them with a few coats of polyurethane. They are shown below drying on some drying stands I made for the Catan Table project.

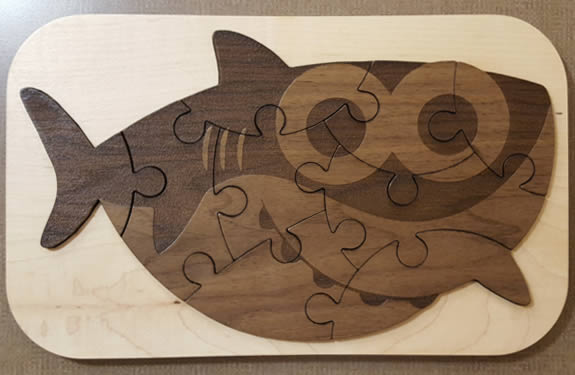
The finished puzzle pieces and base are shown below.
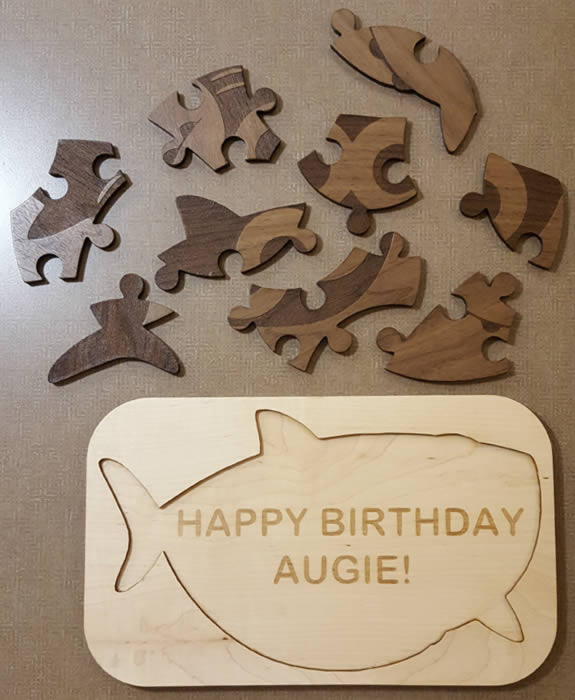
The completed puzzle is shown below.
I also decided to make some coloring pages from the vector files I had created, shown below.
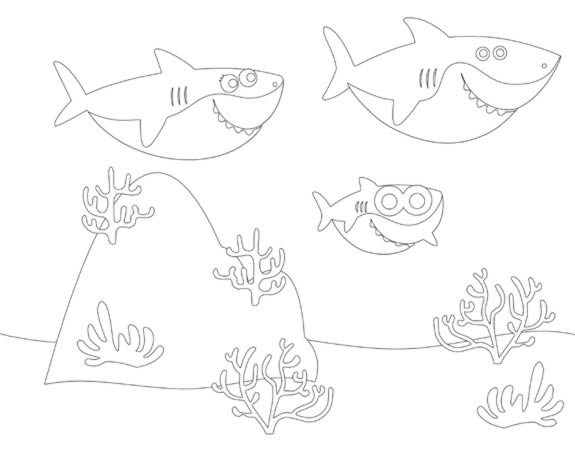
The PDF files for each of the coloring pages can be found below.
(Coloring Page-Sharks-All .pdf)
(Coloring Page-Sharks-Baby .pdf)
(Coloring Page-Sharks-Mama .pdf)
(Coloring Page-Sharks-Papa .pdf)
(Coloring Page-Sharks-Scene .pdf)
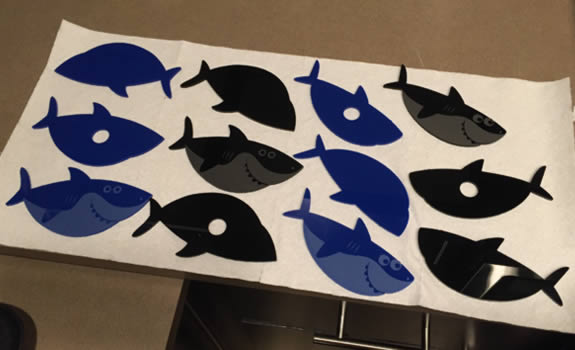
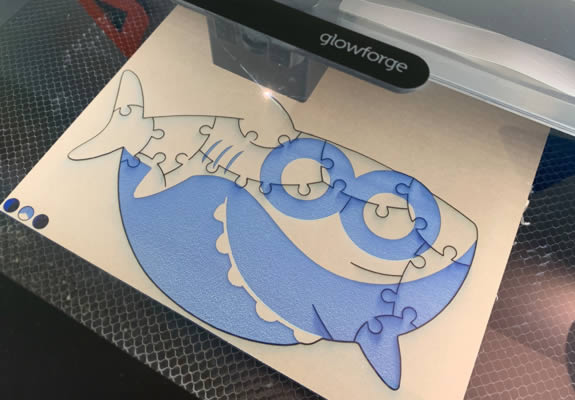
For my nephew's third birthday I decided to make him a slightly more complicated puzzle. I used the same outline size, but cut the design into 19 pieces instead of nine. I decided to make this one out of acrylic instead of wood. The image below shows the parts being cut.
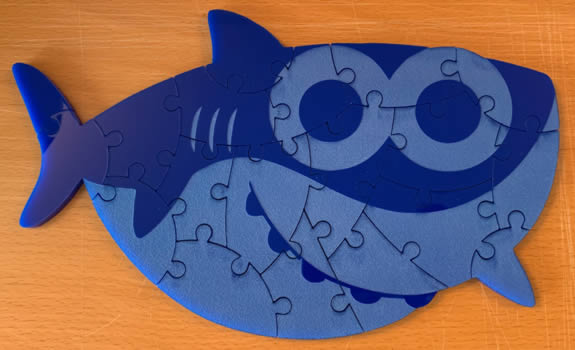
Making the puzzle out of plastic instead of wood required quite a bit less post processing, but it still took a while to sand down all of the sharp edges from each piece. The finished puzzle is shown below.
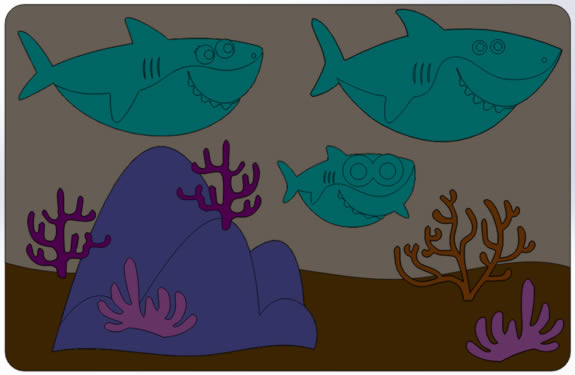
Because I apparently can't give up the Baby Shark theme, I decided it would be cool to make an underwater scene out of wood and plastic. The design for the first one that I made for a friend's son is shown below.
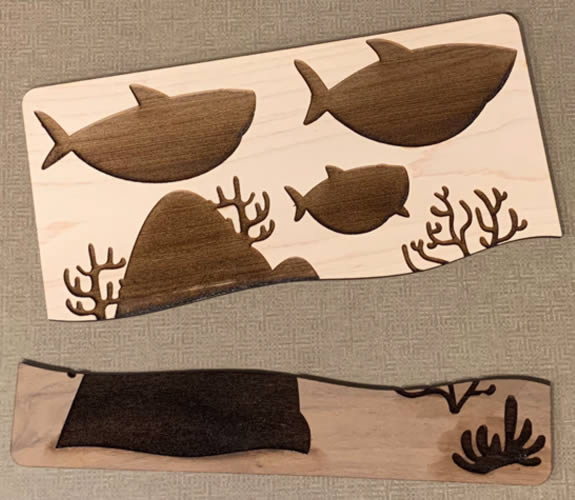
I made the plants and sharks from several different colors of acrylic. The background pieces were made out of maple and walnut from The Wood & Shop Inc. The wood pieces are shown below.
It took a couple tries to get the engraving offset correct for the plastic parts to fit. I should have used a single large piece for the back and then glued on the two pieces with cutouts for the plastic parts instead of engraves. The image below shows the two wood pieces being glued together. The blue plastic part was put in place to make sure the alignment was correct.
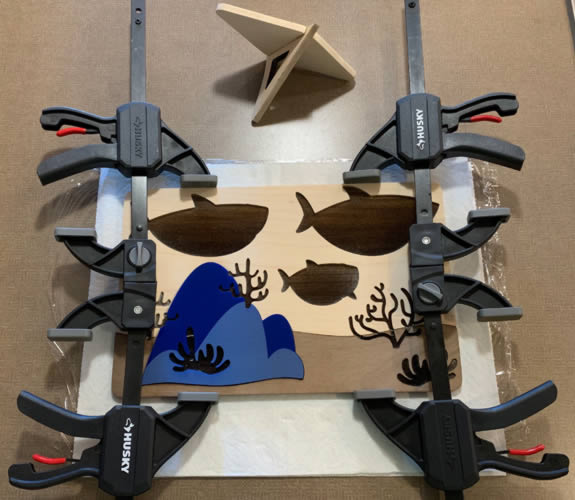
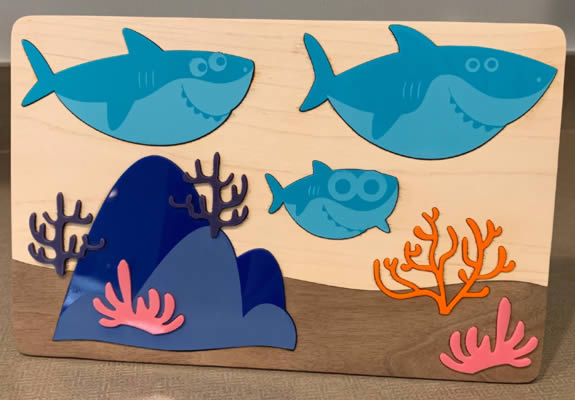
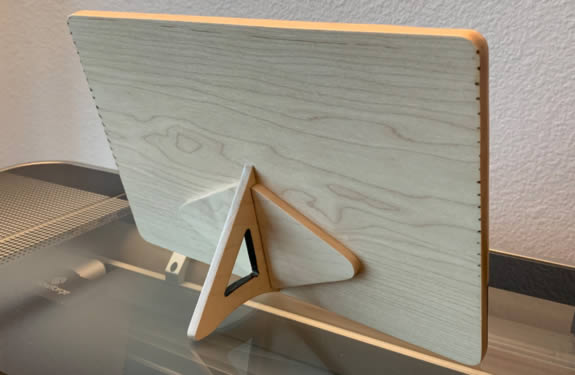
In the image above you can also see the stand parts that will attach to the back. The finished piece is shown below.
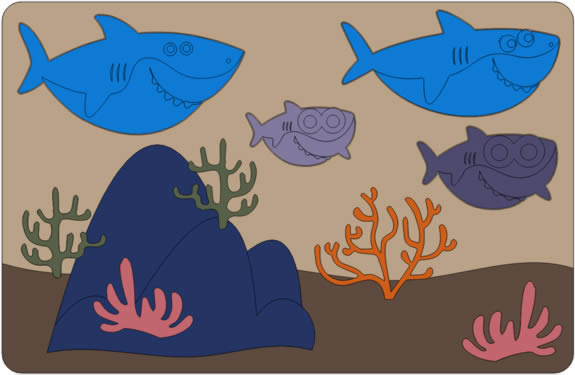
A few months after I made the piece above, my sister had a second kid, and I decided to make her something similar. For her version, I put in a second smaller baby shark. The design is shown below.
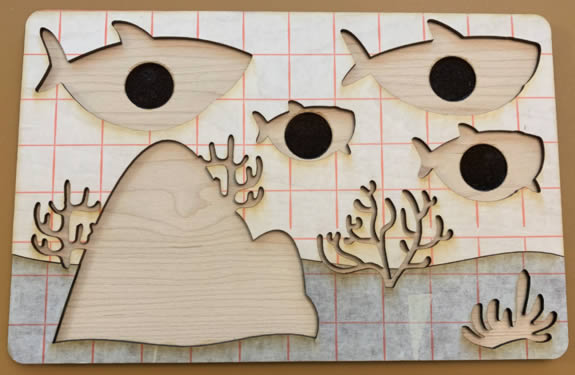
I made this version with a single backing piece, and then glued the two other wood pieces on top of it. I also decided to make the sharks removable. I engraved areas in the backing piece where I could glue in small steel discs, and then made the sharks with magnets in them. The wood pieces after being glued are shown below.
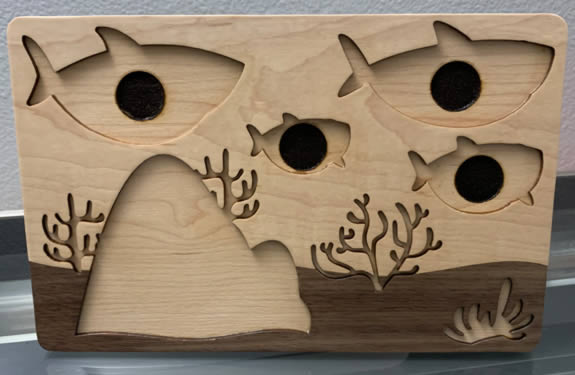
After gluing, the parts were sanded and then coated in polyurethane. The finished wood part is shown below.
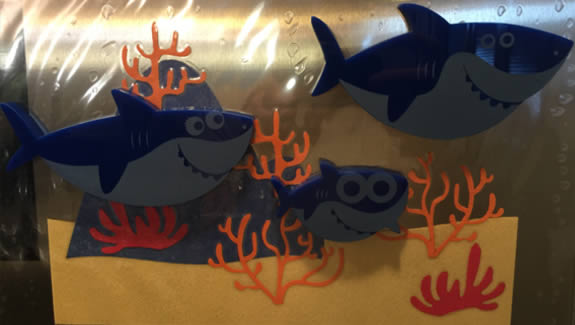
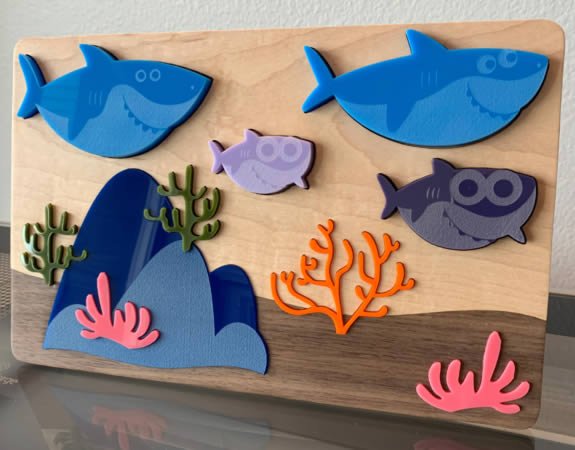
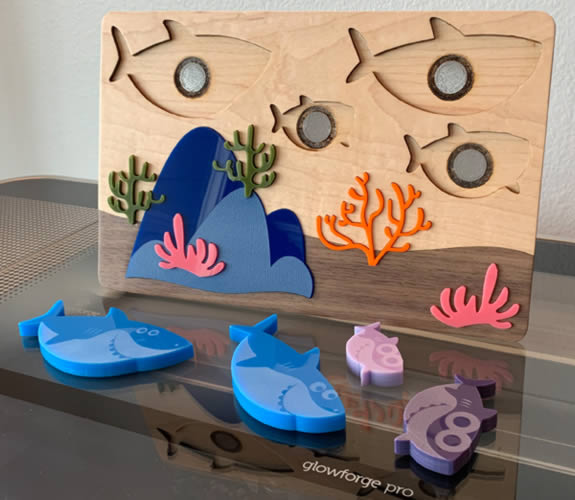
I decided to put thin pieces of acrylic under some of the plants so there was more visual depth. The finished piece is shown below.
The image below shows what it looks like with all of the sharks removed.
The finished piece from the back is shown below.
Page created: 2018