
Menu:
Laser Stuff
Along with my more complicated laser cutter projects like the Hexacopter, and the massive amount of Baby Shark toys, I have also been making a bunch of other random things. This page will highlight some of the smaller projects I have made using the Glowforge.
Pandy Paws
My niece is really into a show called Gabby's Dollhouse. She has a stuffed version of one of the characters on the show, a cat named Pandy Paws. For her third birthday I decided to make her a wood puzzle of this character.
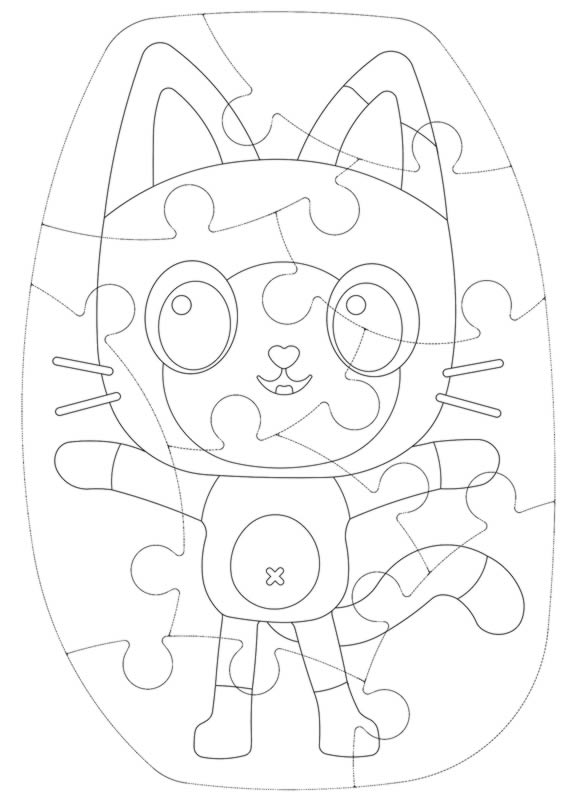
I started by watching some YouTube clips of the show until I found one I could use for a screenshot of Pandy Paws. At first I tried to use Illustrator to automatically trace the outlines of each part I would need to make, but the image had too many different shades, and the output was messy. So instead I had to manually trace everything in SolidWorks. After several hours manually tracing everything, I ended up with the part shown in the image below.

After creating the character in SolidWorks, I also made a base for the puzzle, and added features to cut the character into nine puzzle pieces, shown below.
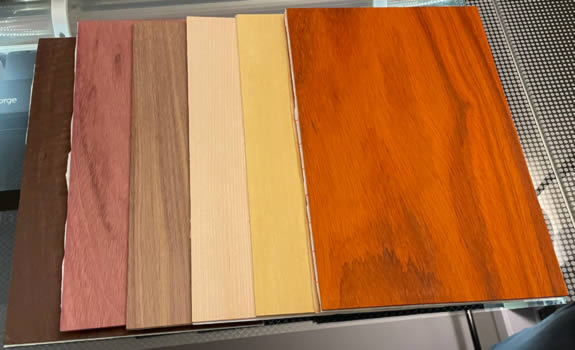
As with most of my wood projects, I decided to use the natural color of different wood types rather than paint the pieces. For this project I needed six different types of wood, shown in the image below. From left to right: katalox, purpleheart, walnut, maple, yellowheart, padauk.
Once I had the wood, I covered it in transfer paper, and started cutting all of the pieces. For most wood types, I tried to move the pieces close together to use less wood, but for the maple parts that made up the main body, I cut them as they were designed so the wood grain would line up. The image below shows the maple parts while they were being cut.
After I had all of the parts cut, I glued them to another piece of yellowheart using Titebond III. I also glued the perimeter piece for the base onto the puzzle base. The image below shows both parts after they were glued.

The image below shows Pandy Paws after the transfer paper from each individual piece was removed.
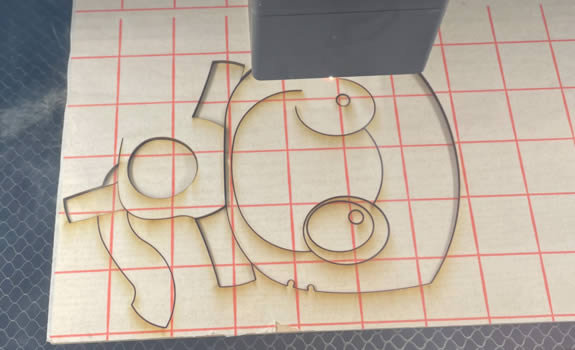
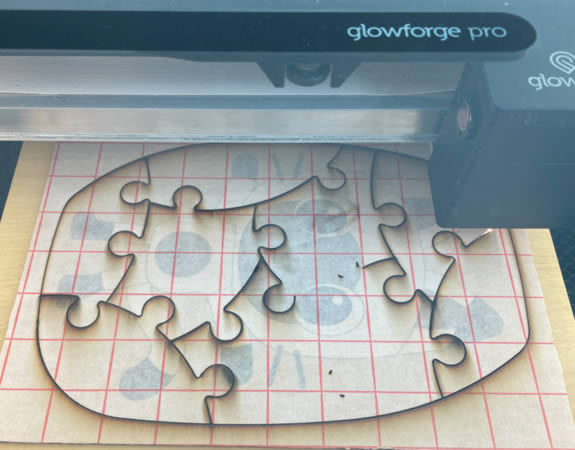
After the parts were glued together, I used an orbital sander to make the surface smooth (there was some variation in the thickness of each wood type). Then I put a new piece of transfer paper on and put the part back into the laser cutter to create the puzzle parts. In the future I need to come up with a way to physically align a part where the cut location is critical. I used the main camera to visually align the puzzle design over the part; it worked well enough, but the cuts weren't exactly where I had planned. The image below shows the part as it was being cut into the nine puzzle pieces.
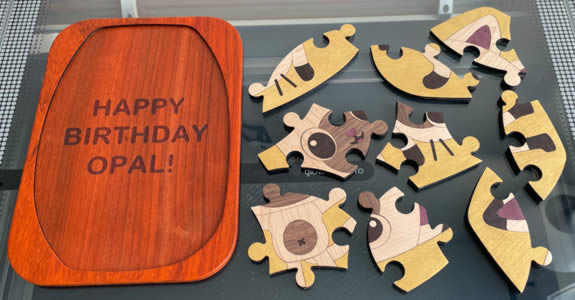
After the puzzle pieces were cut, I noticed some areas where individual parts of the character weren't glued as well as I would like, so I went around the edge of each piece with Permabond 105 cyanoacrylate to make sure everything would stay together. I also used Loctite Super Glue Ultra Gel Control to fill in some gaps on the top of the puzzle pieces. After the glue dried, I sanded everything, and applied three coats of polyurethane (lightly manually sanding after the second coat). The finished puzzle base next to the puzzle pieces are shown in the image below.
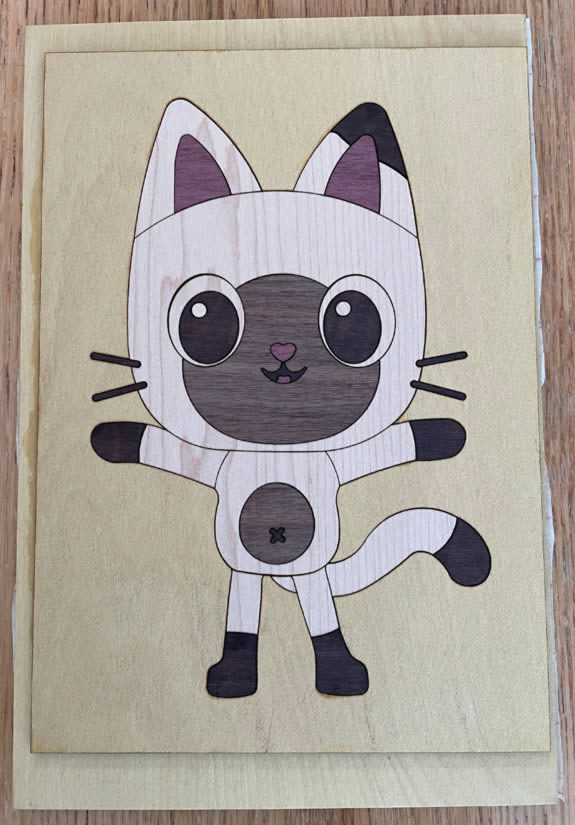
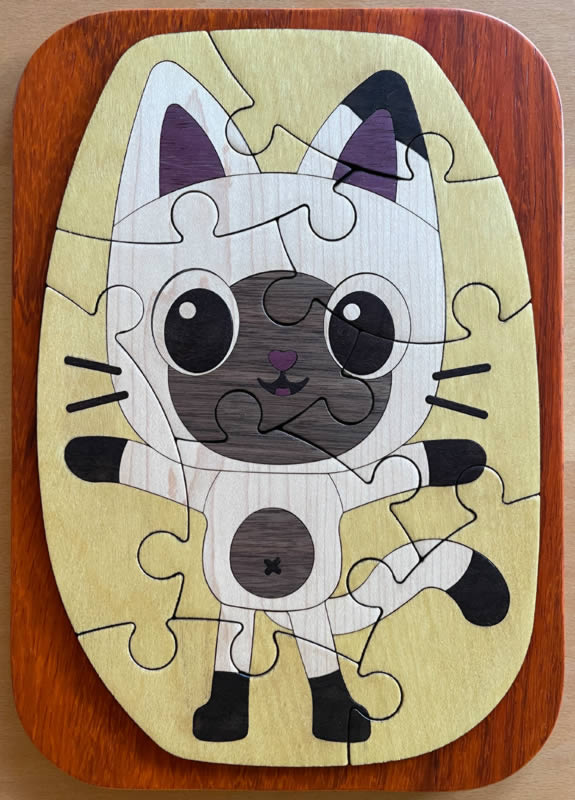
The completed puzzle on top of the base is shown below.
Deck Vent Cover
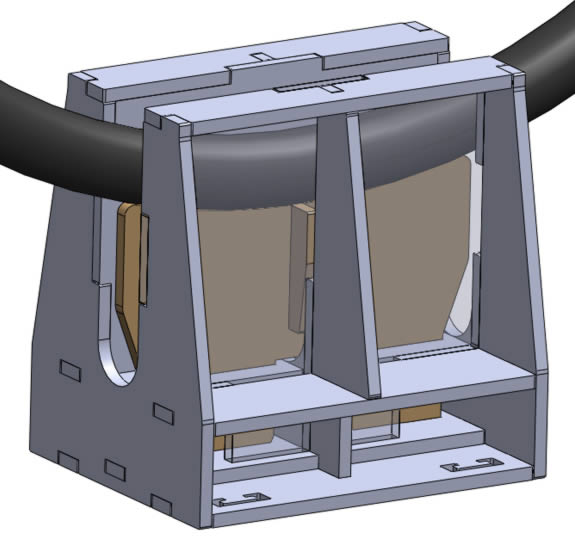
The only vent location for the laser cutter in my apartment is the sliding deck door. This is also the only place I can have the vent for an AC unit. For a while I had vents for both devices that spanned the entire height of the door, with cardboard to block the opening. After buying a second AC unit I decided I needed to make something custom that would let me attach the laser cutter exhaust and both AC units to a single cover. The image below shows the design in CAD.
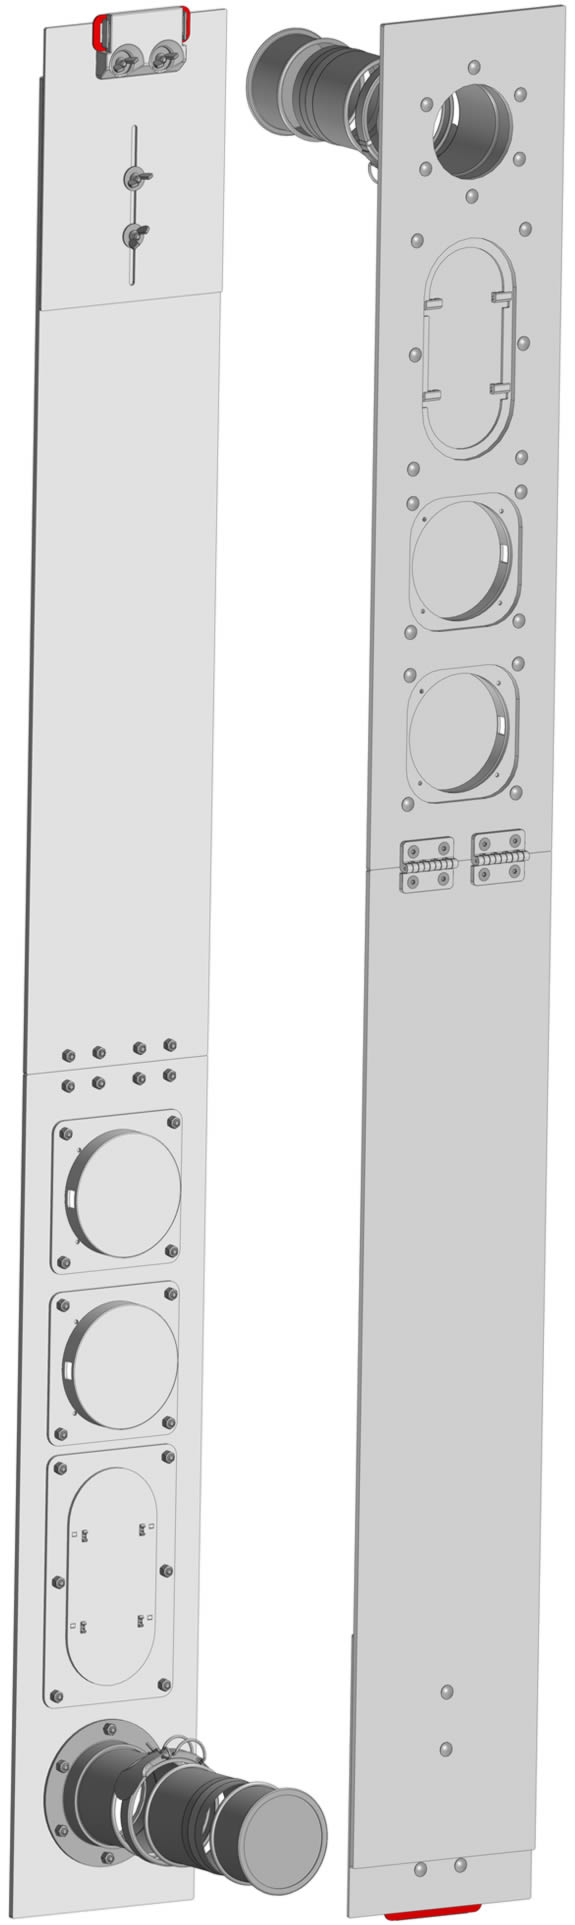
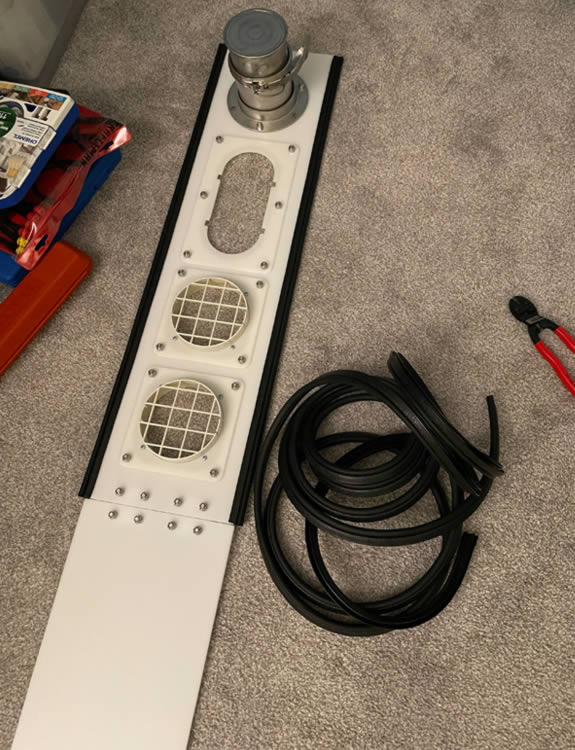
I made the cover out of 1/4" Delrin, which had to be laser cut in several steps because of how large the two main pieces are. The cover has a 4" quick disconnect duct on the bottom for the laser cutter exhaust, a custom connection in the middle for my new AC unit, and two 5" connections at the top for my old AC unit. The center of the cover has hinges so it can fold to a more compact size, and the top height is adjustable with a clamp piece to attach to the top of my deck door. The top attachment piece prevents the cover from moving when the door is open.
The two 5" blocking parts are 3D printed from PETG, and the middle one is a laser cut part with 3D printed clips to hold it in place. The top clamp that holds the cover in place is also 3D printed, and has a laser cut piece of red silicone to add friction.
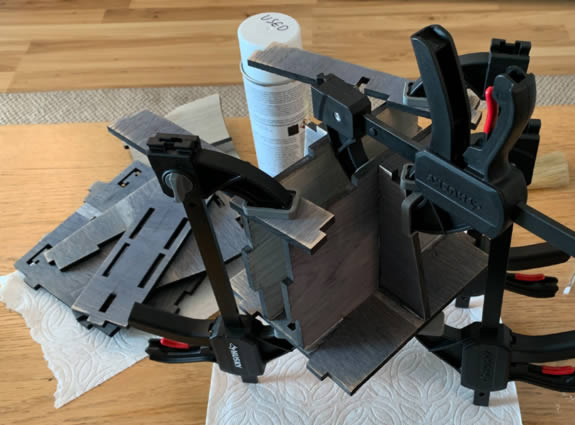
I was able to find some trim seal that would go along the edges to help seal between the cover and door. The image below shows the seal being added.
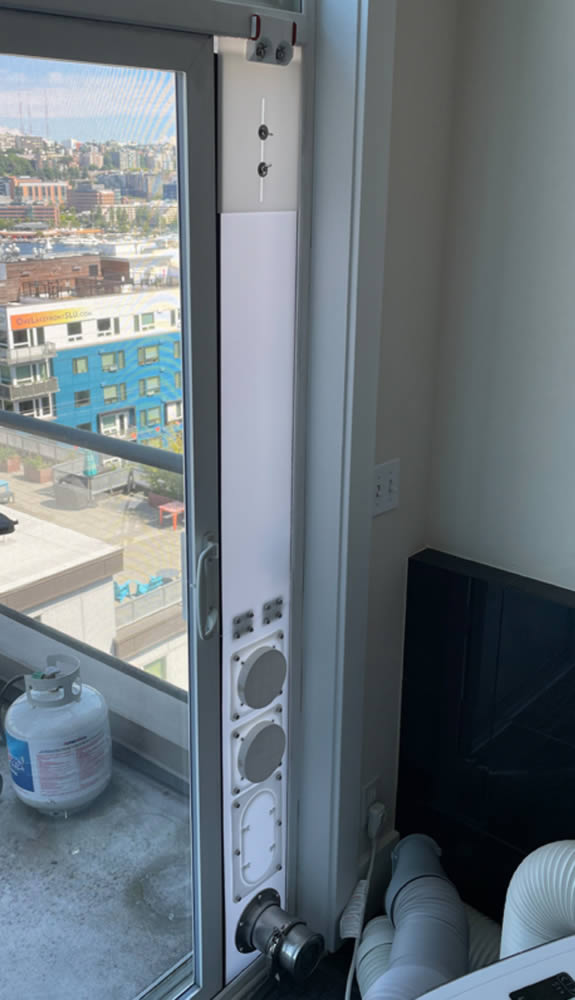
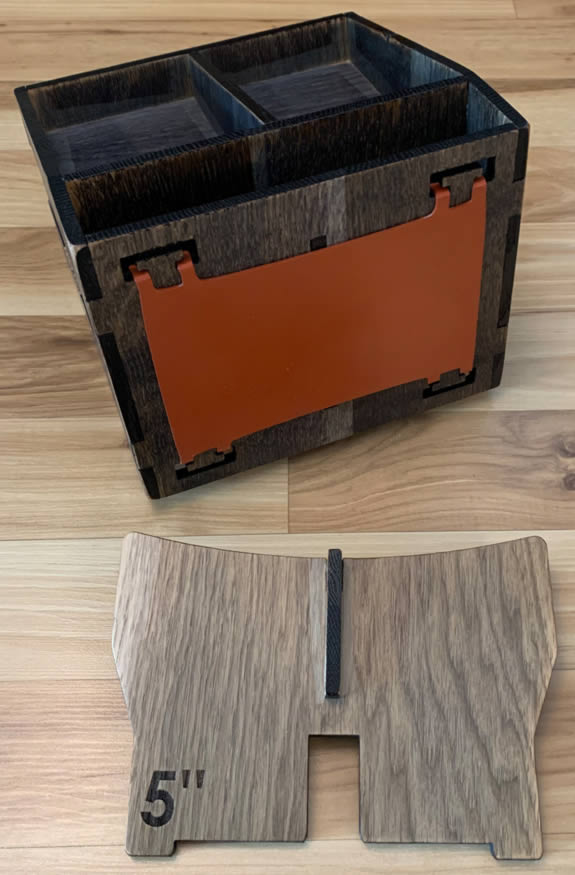
The finished cover with all of the ports blocked is shown below.
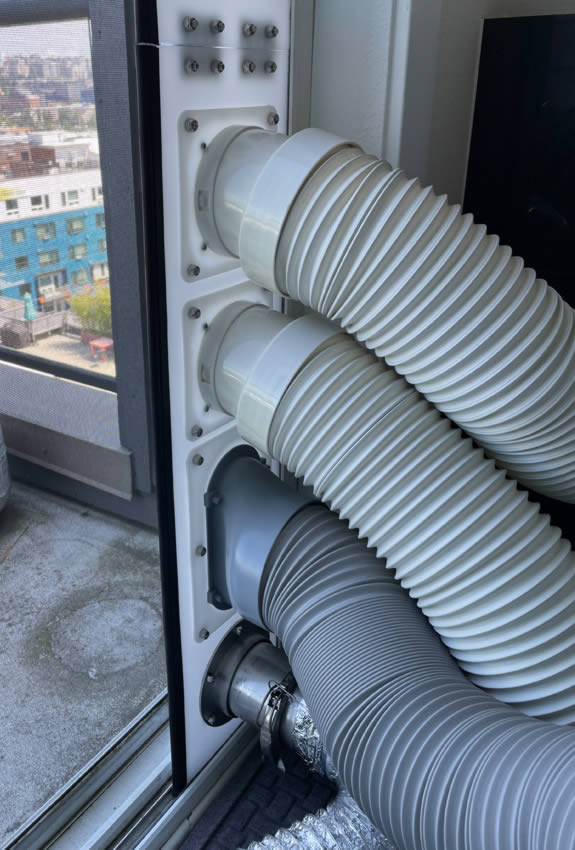
The image below shows the cover with all ports connected.
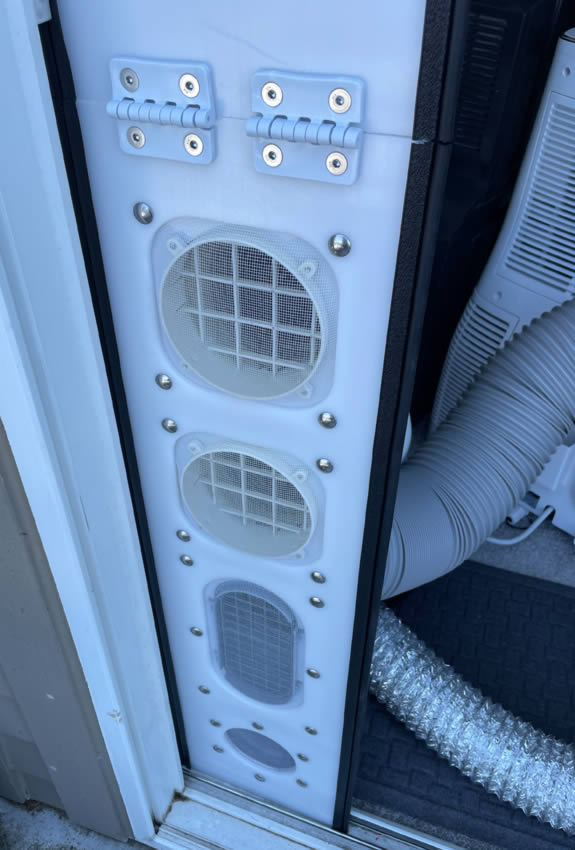
I also decided to add fiberglass screen mesh on each opening to keep bugs from flying into the hoses, this is shown below.
Chair Cover
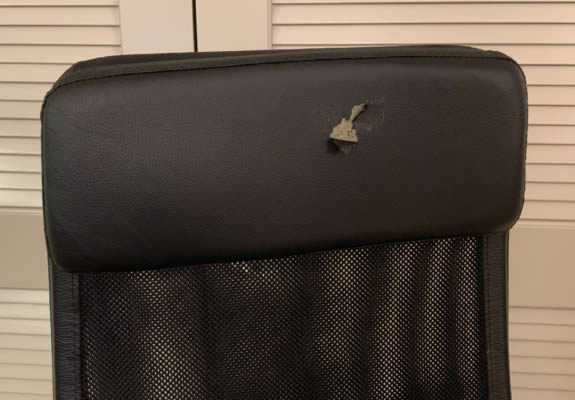
A tear appeared in the vinyl headrest of my Ikea desk chair. Apparently the seat and armrests were leather, but the headrest was vinyl. At first I used a vinyl repair kit I had, but that didn't last long. I couldn't find a way to get a replacement so I decided to use this as an opportunity to try making a cover out of leather. The image below shows the tear.
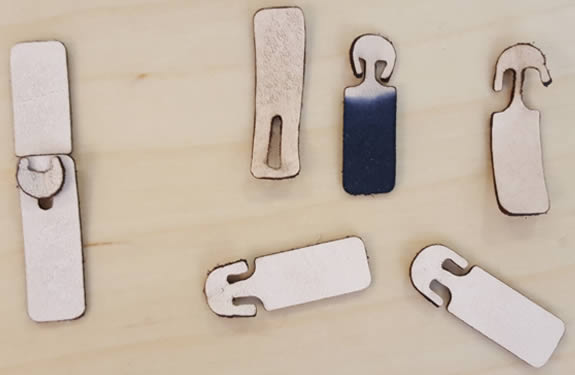
I decided to come up with a way to assemble the headrest cover without sewing. I started testing some designs to use a fish hook style connector that I could add to the leather design. Some of the test parts are shown below. One of them was also part of a dye test.
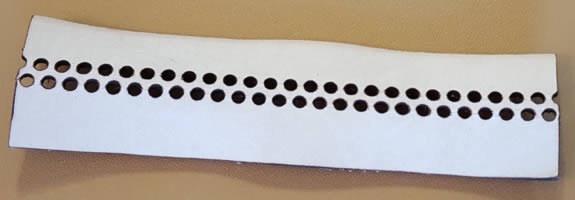
I also did some testing to see what would work well to create creases where the leather would need to fold, shown below.
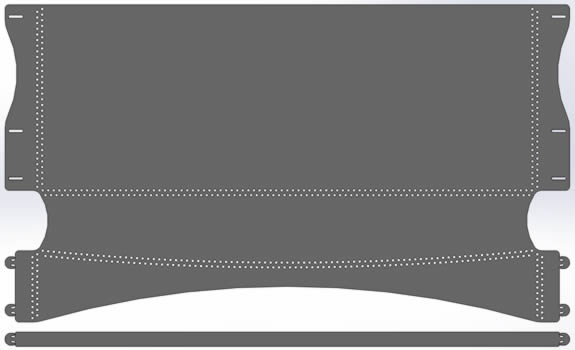
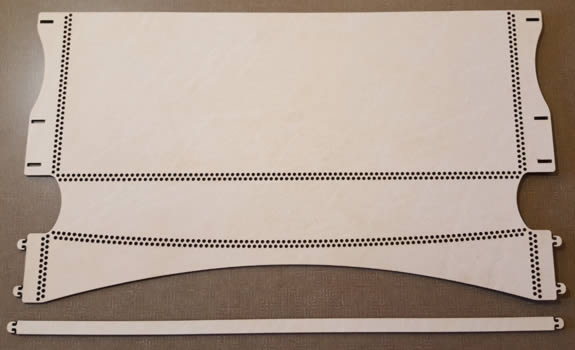
Along with all of the testing above, it took me a few tries to dial in the size and feature placement to get everything to fit well. The final design for the cover is shown below.
The image below shows the two pieces of the cover after being cut.
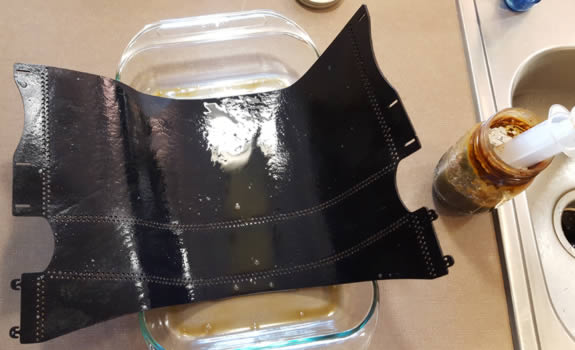
To dye the leather black, I found a method that involved dissolving iron (steel wool) in vinegar to create "vinegaroon". It isn't actually a dye, but instead chemically alters the leather in a way that turns it black. The image below shows the leather as it was being dyed.
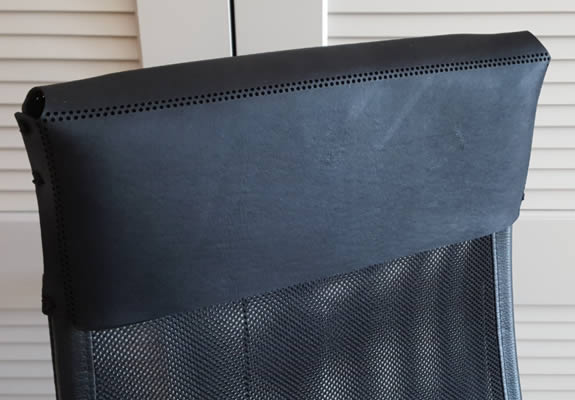
After dyeing the leather I added a small amount of oil to the top and then the cover was finished. The image below shows the cover on the chair from the front.
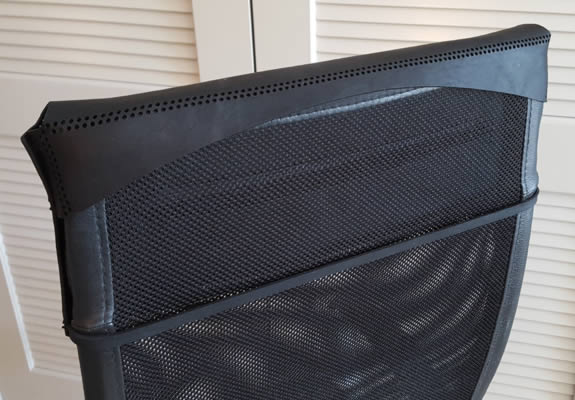
And the following image shows the cover on the chair from the back.
Pedal Desk (abandoned)
While working from home, I thought it would be nice to have a standing desk. Then thought a pedal desk would be better! I bought a trainer stand for my bike and started working on a way to turn it into a desk.
After sitting on the bike I realized the front was angled down too far with the back wheel lifted, so I needed to design something to get the front tire off the ground. I decided I might as well make something that I could adjust. I came up with the design below. The center brown piece in the image is removable, so I could make different height versions later.
While working on the Catan project I realized I could use vinegaroon (that I used to dye leather) to dye wood. I was trying to come up with a way to make the wood blue, and it ended up working on a few types of wood. I decided to experiment a little with it on this project. I believe the parts that ended up blue in the image below were either red or white oak.

After the parts had been dyed, I started gluing them together. The image below shows part of the assembly clamped together as the glue dried.
After everything was assembled and sprayed with lacquer, I made a silicone piece for the bottom to keep it from sliding around. The finished parts are shown below.
The image below shows the lifter under my front bike tire.

After designing the lifter I decided to take a break from this project. When I decided to start working on it again, I started to question if it would be worth the time and cost to finish the project. I eventually decided the effort to securely attach a desk to my bike frame probably wouldn't be worth it for the amount I would end up using the desk, so I abandoned the project.
Coasters
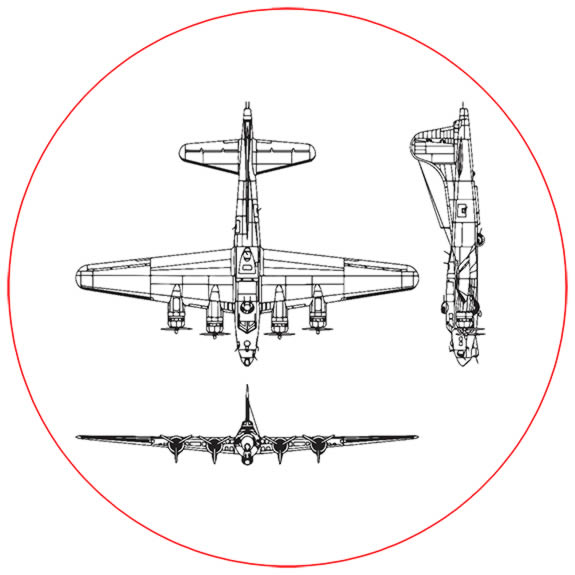
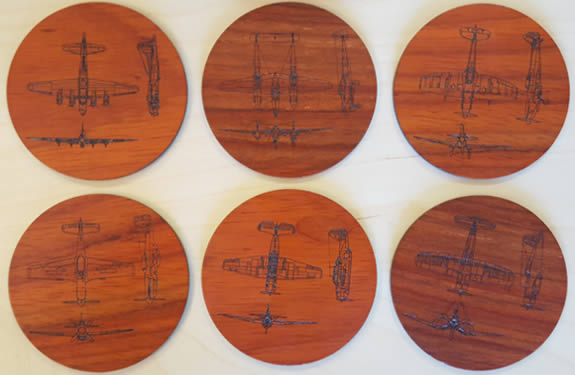
For a while when I was growing up, my dad would occasionally fly some of Evergreen Aviation's WWII planes. I decided to make him some coasters using a top, front, and side view of six of those planes: Boeing B-17 Flying Fortress, General Motors TBM Avenger, Lockheed P-38 Lightning, North American P-51 Mustang, Supermarine Spitfire, and Vought F4U Corsair.
I was able to find decent quality views of each of these planes, and used Illustrator to resize and orient each of the views so the coasters would have a similar look. The image below shows the final design for the B-17.
After all of the designs were finished, I engraved and cut them from padauk and walnut. Two of the designs are shown below as they were made.

After cutting all of the parts they were sanded and then coated with polyurethane. The coasters made from padauk are shown below.
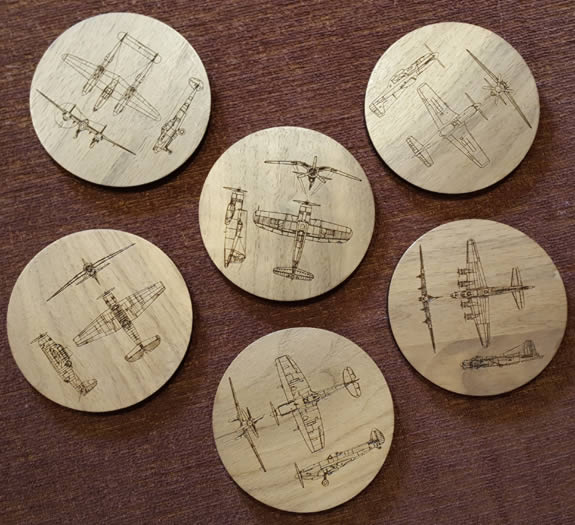
And the coasters made from walnut are below.
Mics
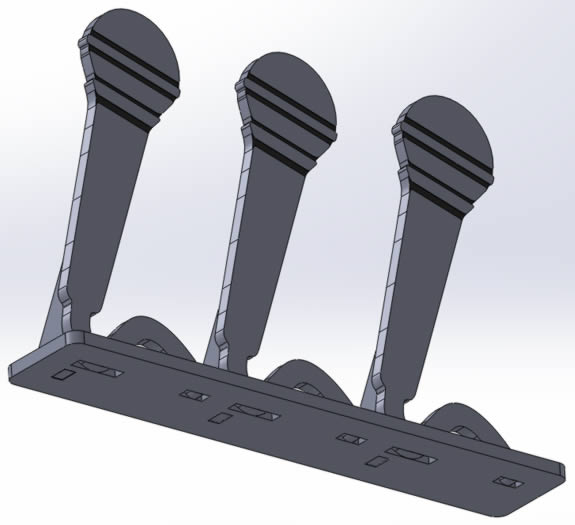
I decided to make a birthday present for one of my friends that likes to do karaoke. So I made her a wooden microphone art thing. I found a graphic image of a mic, used Illustrator to convert it to a vector file, and imported it into SolidWorks to create a solid model. I then decided to use three of them, and created a base so they would all stand up. An image of the finished CAD is below.
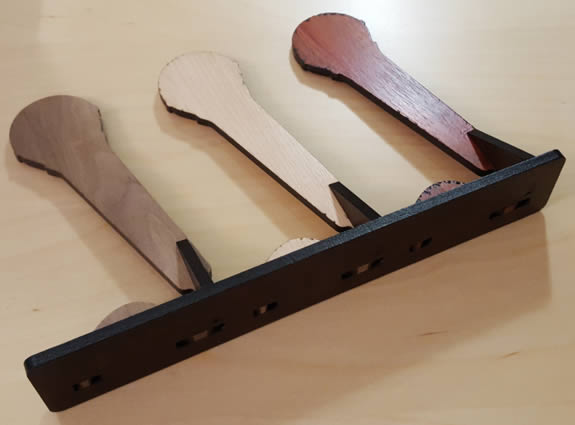
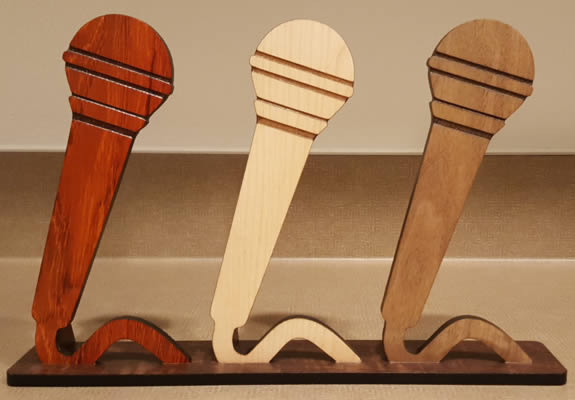
I made the mics out of maple, padauk, and walnut, and made the base and other supporting pieces from katalox. The image below shows the back side of the finished piece.
The image below shows the finished piece from the front.
Pineapples
A friend invited me to a party he was calling "Pineapple Day" so I decided to make some wood pineapples. I found a graphic image of a pineapple, and converted it to a vector file with Illustrator. I imported it into SolidWorks to create a 3D model, and then created a PDF from that. The cut and fill colors for the PDF were created in Inkscape. The 3D model and final PDF are shown below.
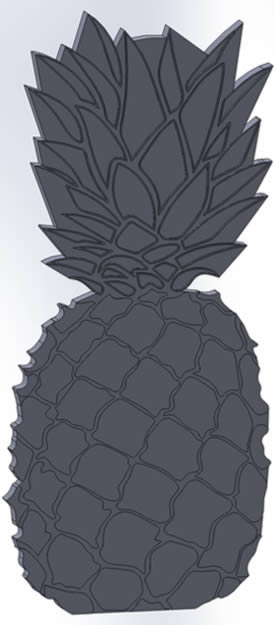
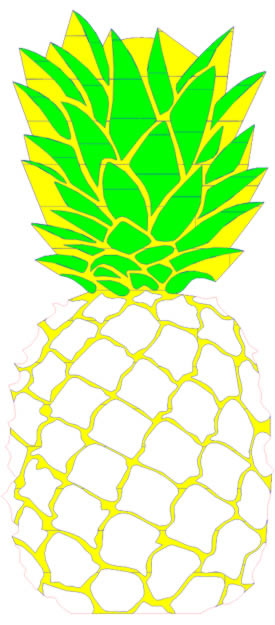
The lines inside the fills in the PDF file above are created because the manual fill tool in Inkscape only fills what is on your screen, and if you zoom out all the way the resolution of the fill is very poor because it seems to scale based on zoom level. To get a high resolution fill, so the edge detail is high, I had to zoom in a bunch of times and fill each section at a time. The lines were created on the border of each fill. Unfortunately some of these lines are slightly visible in the finished product. I need to spend some time figuring out a way to work around this.
The image below shows one of the pineapples being engraved.

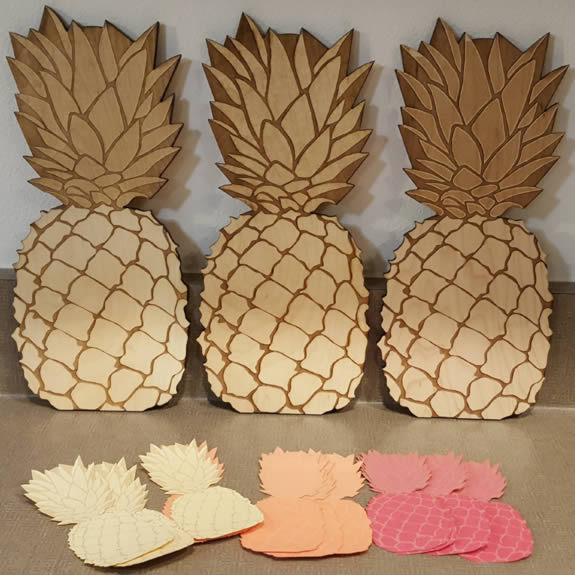
I made three different versions, with slightly different engrave power settings. These are all shown in the image below, along with some paper pineapples I was planning to tape to my shirt.
Wood Samples
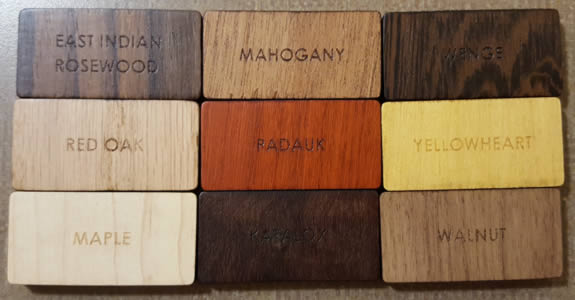
Since I've been using wood for so many of my projects, I thought it would be a good idea to make some sample pieces of each wood type. The samples below show nine different wood types I have been using. Each sample has the name of the wood engraved on the front, and they have been sanded and coated with polyurethane. The nine types are: East Indian rosewood, mahogany, wenge, red oak, padauk, yellowheart, maple, katalox, and walnut.
Page created: 2019